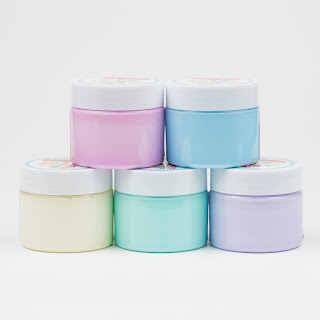
If you are a pro artist, you may have an idea about what Resin Art is. A resin is a fabulous medium to use to come up with an amazing art. Though, you must have at least basic knowledge to indulge in with the different Resin Colour so that your final outcomes turn out to be mesmerising.
You can use resin on a variety of materials - a canvas, a wooden piece, metal prints and so on. It all depends on your preference and the type of creative that you are looking forward to. So let's begin with a step-by-step process - a beginner's guide for all the resin users.
Step 1: Buying the Essentials (Materials)The basic materials that you may need with your Resin Art include:
- Canvas - You can use the usual painting canvases that you tend to easily get in the market. If you want to try something different, you can even use plywood. Here we will consider wood as our base for the art.
- Resin - Consider buying the resin that is a 1:1 ratio between clear epoxy resin and hardener.
- Paint/Spray Paint - Get some idea about the Resin Colours that you will be using in your artwork. Accordingly, you should decide on the paint options.
There are many other materials to consider including plastic disposable cups, large Popsicle sticks, plastic sheath and latex gloves.
Step 2: Cut the Wood to Your Desired Size
The second step involves cutting the wood the way you want. Later, sand down the edges so that they have a smooth and rounded finish. Try getting the wood that has less of a warp as the resin may leave white edges on your work by filling in the lower areas.
Step 3: Prime the Wood
The wood without the primer will represent a wood texture to your art. With the use of a primer, the colours come out better and hence, consider spray painting before commencing with your art.
Step 4: Plan Your Colours
This is totally your call. Choose your favourite colour, explore the combinations, try creating a landscape or simply follow colours found in nature. It is all a personal choice that will surely differ from one artist to another.
Step 5: Prepare a Canvas and Mix Resin by Pouring Them into Cups
Your canvas should be ready by now. Pour the resin in the cups after mixing them thoroughly and add the colours that you have decided already. Once done, pour the resin onto the wood.
Step 6: Heat Gun to Avoid the Bubbles and Cover Your Art
If you want your Resin Art to be subtle and without any bubbles, heat gun it and finally cover your piece and let it sit for 8 hours. To ensure that it is set, do not touch the piece, instead, touch the resin that may have drip off the board.
Isn't it simple and easy? Follow the guide and you can be sure of getting a splendid outcome in the end. If you are concerned about getting the supplies like Resin Colours, do not worry as Art Tree Creations will help you do the needful. Being an online platform of art essentials, the team is sure to provide you with your requirements. For inquiry or information, contact the team at 0439 326 333.

No comments:
Post a Comment